In the previous blog post we integrated Vivado with GitLab CI to automatically build the FPGA bitstream.
What about simulation? In this video I am going to show you how to run and debug cocotb test cases locally and then how to run them with Gitlab CI.
Video
If you prefer this content in video format, it is embedded below.
Cocotb
Cocotb is an open source Python library for writing RTL testbenches. We’re going to install it locally first so we can write and debug the test cases before integrating them with Gitlab CI.
Create a new Python environment
python3 -m venv .cocotbvenv
source .cocotbvenv/bin/activate
And install cocotb
pip3 install cocotbWe can check that cocotb has installed correctly with this command:
cocotb-config --versionWe also install cocotb-bus which is an additional library that has bus drivers and bus monitors for AXI, AXI lite, etc.
pip3 install cocotb-busWe install pytest that will be used to run the test cases
pip3 install pytestwe’re going to use icarus as simulator with gtkwave to view the waveforms. I had to modify the RTL to run the simulation in icarus since it is not 100% compatible with the RTL code in the XPM libraries. If you use Modelsim or other commercial simulators you can use the code without changes. You just need to add the XPM libraries to the simulation environment.
Note that the Vivado simulator is not compatible with cocotb.
sudo apt install iverilog
sudo apt install gtkwave
Integration with PyCharm
How can you debug your cocotb testbench to inspect variables, run step by step etc.? You can use PyCharm that offers remote debugging capabilities, but only in the professional version.
We need to install the PyCharm debug server:
pip install pydevd-pycharm~=251.23774.444Note that there is a known issue with the previous versions of pydevd-pycharm. If you are using Pycharm 2025.1 it works fine.
And we have to add two lines of code in our test cases to start the debug server.
import pydevd_pycharm
pydevd_pycharm.settrace('localhost', port=9090,stdoutToServer=True,stderrToServer=True)
Writing testbenches
Let’s checkout the code for the system version IP that has also a test case written in Python using cocotb.
git clone https://github.com/starwaredesign/ip_repo.gitLet’s open the ip repo directory with Pycharm and have a look at the sim directory. The system_version.py file has some helper functions to read the registers in the IP block and extract the various fields like version major, minor, etc,. Test_system_version.py has the test runner and one test case. Let’s go through the code starting with the runner.
We have sources that contains the path to the RTL code. In this case there is only one file. Then parameters that we’re going to pass to the simulator to configure the IP. We’re going to export these parameters as environment variables so we can access them in the test case.
The runner build phase is where the source code is analysed by the simulator and the test phase is where the simulator is running.
Note that I have defined SIM equal to 1. This is because Icarus verilog doesn’t correctly read the XPM library source code so I replaced the XPM CDC code with an equivalent in RTL.
Also note that there are some pytest parameters. I have randomized major, minor, and build version. I can’t do that inside the test case since those are verilog parameters.
Inside the test case we assign random board type and revision. We can do that in the test case code since those are input ports.
Then we assert the reset, start the clock generator, create an AXI lite driver, and read the various registers in the system version IP comparing with the expected values.
Now to run the test case with Pycharm, create a new run/debug configuration of type “Python debug server” and set the port to 9090.
Set a breakpoint at the beginning of the test case and start the debug session.
Now run the test.
PYCHARM_DEBUG=1 pytest -s -v --log-level=INFOAnd you can see we can execute the python code step by step, look at the variable value, etc.
After the test case has completed we have a few output files. We have test_system_version.log that contains the detailed log output. Inside sim_build we have a .fst file that we can open with GTK wave. The file with the .None extension is the XML output that Gitlab will use to show the total number of tests, how many pass/fail, etc. This file should have the XML extension, but it is an issue that has been fixed on the main git branch, but not in the stable release at the time of the creation of this blog post.
Integration with Gitlab
Update the vivado docker git repo and rebuild the docker image. This image has now cocotb, cocotb bus, and icarus verilog.
cd vivado-docker
git pull
docker build --build-arg VIVADO_TAR_HOST=192.168.1.56:8000 --build-arg VIVADO_TAR_FILE=FPGAs_AdaptiveSoCs_Unified_2024.1_0522_2023 -t xilinx:2024.1 --build-arg VIVADO_VERSION=2024.1 --build-arg PETALINUX_VERSION=05202009 .
See the blog post AMD/Xilinx Vivado and Petalinux integration with Docker and GitLab for more details. In that blog post I have shown how to integrate Vivado with Gitlab. In particular, how we use the gitlab ci yaml file to tell gitlab how to build the bitstream, what to save as artifact, etc.And add the meta layer as submodule
But the test case we have is specific to the system version IP, so it makes sense to have a Gitlab ci yaml file just for the system version IP and we can run the same test for every design where we use that IP.
Gitlab has the concept of parent and child pipelines. We can have a config file inside the system version IP directory and reference it in the top level config file.
So let’s update the ip_repo submodule in our example and have a look at the yaml file gitlab-ci.yml.
test:
 variables:
 GIT_STRATEGY: clone
 FF_DISABLE_UMASK_FOR_DOCKER_EXECUTOR: "true"
 GIT_SUBMODULE_STRATEGY: recursive
 image: xilinx:2024.1
 tags:
 - xilinx
 script:
 - source ~/.profile && cd $IP_PATH/sim && pytest -s -v --log-level=INFO && cd ..
 artifacts:
 when: always
 paths:
 - $IP_PATH/sim/sim_build/*.None
 reports:
 junit: $IP_PATH/sim/sim_build/*.None
We can see there is a call to pytest to run the test and we save the xml as an artifact.
Now we have to edit the yaml file in our example like this:
stages:
 - setup
 - test_ip
 - build
setup_submodules:
 stage: setup
 image: xilinx:2024.1
 tags:
 - xilinx
 variables:
 GIT_STRATEGY: clone
 FF_DISABLE_UMASK_FOR_DOCKER_EXECUTOR: "true"
 GIT_SUBMODULE_STRATEGY: recursive
 script:
 - git submodule update --init --recursive
 artifacts:
 paths:
 - fpga/ip_repo/starwaredesign/systemversion_v1_0/.gitlab-ci.yml
test_ip_systemversion:
 stage: test_ip
 variables:
 GIT_STRATEGY: clone
 FF_DISABLE_UMASK_FOR_DOCKER_EXECUTOR: "true"
 GIT_SUBMODULE_STRATEGY: recursive
 IP_PATH: "fpga/ip_repo/starwaredesign/systemversion_v1_0"
 trigger:
 include:
 - artifact: fpga/ip_repo/starwaredesign/systemversion_v1_0/.gitlab-ci.yml
 job: setup_submodules
 strategy: depend
build:
 stage: build
 variables:
 GIT_STRATEGY: clone
 FF_DISABLE_UMASK_FOR_DOCKER_EXECUTOR: "true"
 GIT_SUBMODULE_STRATEGY: recursive
 image: xilinx:2024.1
 tags:
 - xilinx
 script:
 - source /opt/Xilinx/Vivado/2024.1/settings64.sh && cd fpga && scripts/build_fpga.sh && cd ..
 - source /home/xilinx/petalinux/2024.1/settings.sh && cd linux && scripts/build_image.sh devopsexample
 artifacts:
 paths:
 - linux/**/images/linux/image.ub
 - linux/**/images/linux/BOOT.BIN
 - linux/**/images/linux/boot.scr
 - fpga/vivado/**/impl_1/*.bit
First of all I have created 3 stages: setup, test, and build. The build stage is the same as the previous blog post.
Since the IP repository directory is a Git submodule, I had to create a new stage just to a Git clone and save the Gitlab CI file as an artifact. That artifact is then used for the next stage, test IP where I include the gitlab CI file from the IP repo.
Now we commit everything and see what happens in Gitlab.
git commit -am “Update IP repo; add running tests in gitlab CI.”
git push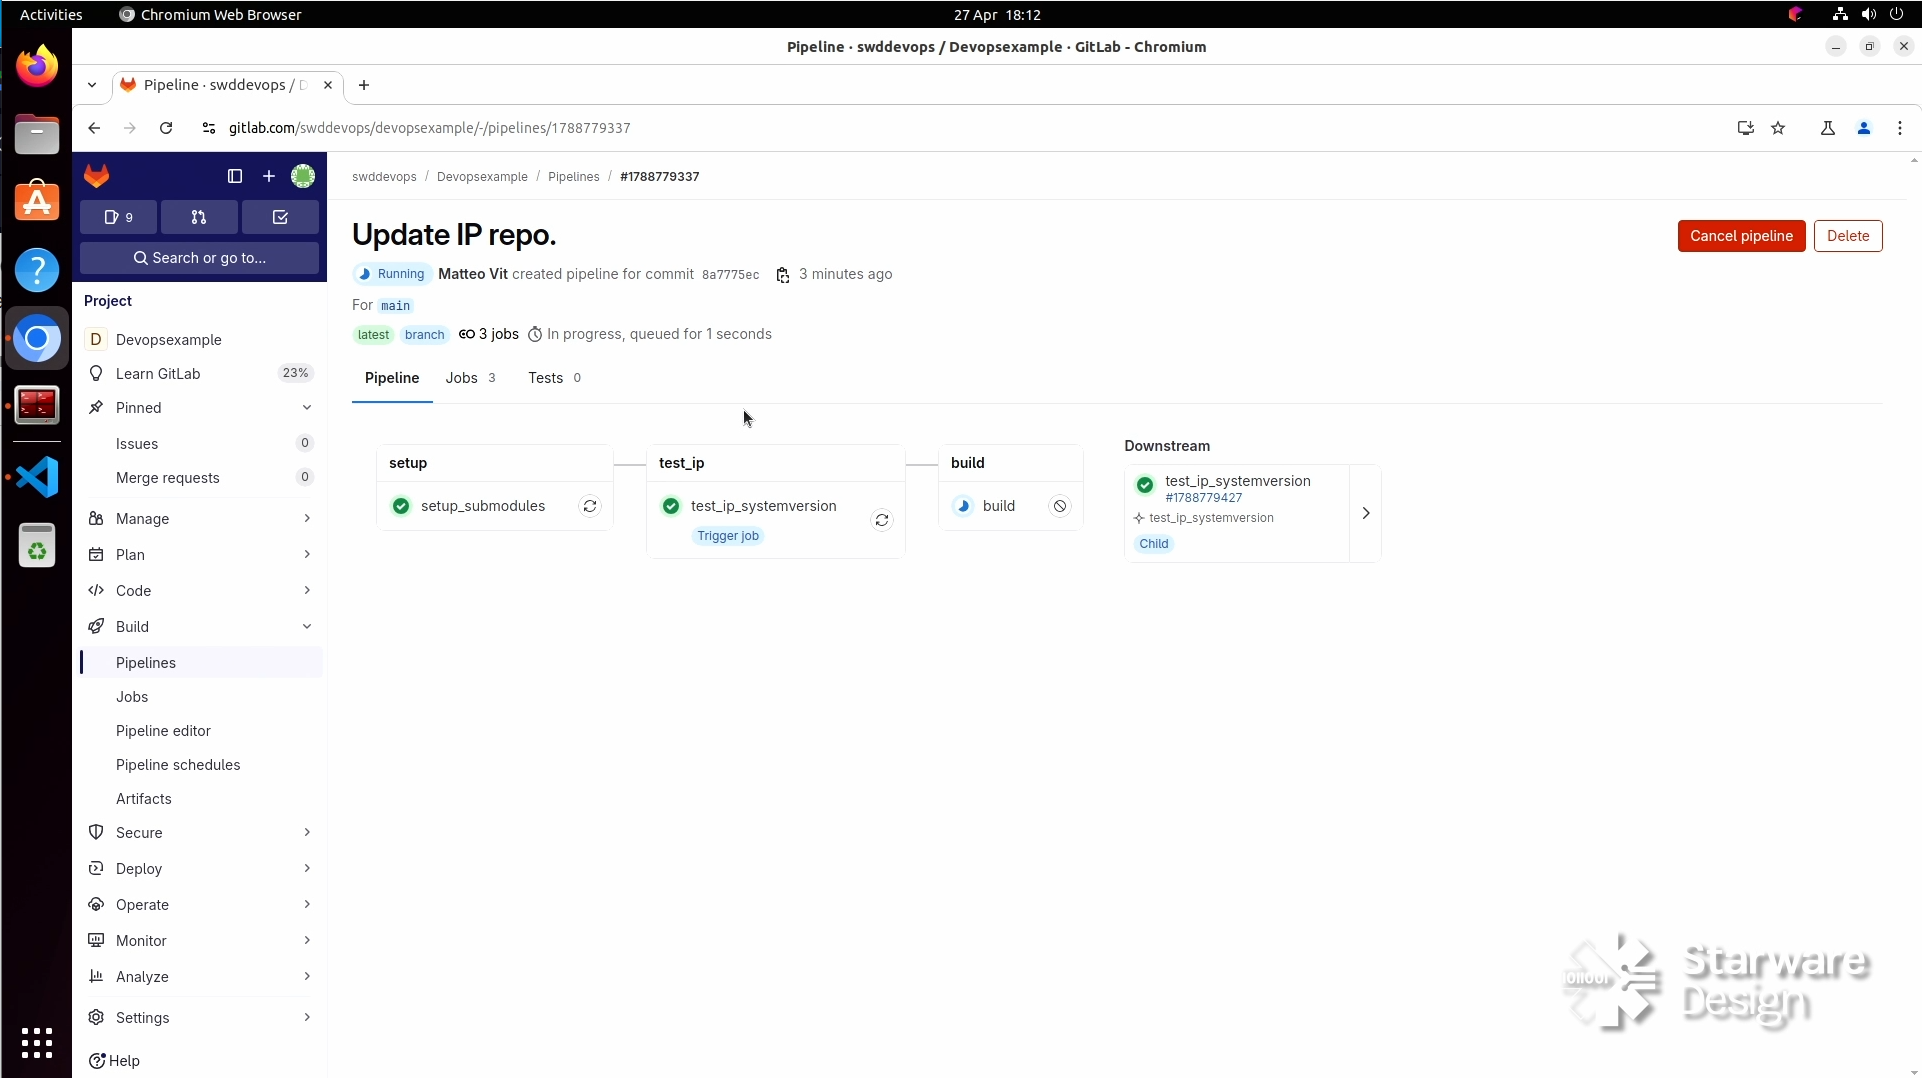
There are the 3 stages in the pipeline and the test stage actually runs the configuration file from the IP repo folder. And there was one test that was run successfully.
Conclusion
In this blog post I have shown you how to run tests for an IP as part of the CI pipeline. The tests are written using cocotb, an open source library that can be used to write RTL test benches in Python. Also I have shown you how to use PyCharm to debug the test benches.
Disclaimer
All trademarks, logos, and brand names shown on this blog post are the property of their respective owners. The use of these trademarks does not imply any affiliation with, or endorsement by, their owners. This video is intended for educational/entertainment/informational purposes only, and no copyright infringement is intended.