Build and deploy Yocto Linux on the Xilinx Zynq Ultrascale+ MPSoC ZCU102
In this first article about the Xilinx Zynq MPSoC we will see how to build and deploy a basic Yocto Linux image.
Yocto Image build
The creation of the Yocto image is very similar to any other embedded system. Start cloning the git repos for Yocto poky and the meta-xilinx layer:
git clone -b master git://git.yoctoproject.org/poky.git
git clone -b master git://git.yoctoproject.org/meta-xilinx
Initialise the environment with:
source poky/oe-init-build-env
Then add the meta-xilinx layer to bblayers.conf so that it looks like
# POKY_BBLAYERS_CONF_VERSION is increased each time build/conf/bblayers.conf
# changes incompatibly
POKY_BBLAYERS_CONF_VERSION = "2"

BBPATH = "${TOPDIR}"
BBFILES ?= ""

BBLAYERS ?= " \
  /home/matteo/projects/zynqmp/yocto-zynqmp/poky/meta \
  /home/matteo/projects/zynqmp/yocto-zynqmp/poky/meta-poky \
  /home/matteo/projects/zynqmp/yocto-zynqmp/poky/meta-yocto-bsp \
  /home/matteo/projects/zynqmp/yocto-zynqmp/meta-xilinx \
  "
Add the machine type to local.conf
MACHINE ?= "zcu102-zynqmp"
Now create a Yocto image i.e. core-image-minimal
bitbake core-image-minimal
After a while ARM trusted firmare, u-boot, Linux kernel, device tree and root file system will be ready in tmp/deploy/images/zcu102-zynqmp.
FPGA bitstream creation
Create a basic ZynqMP system in Vivado i.e. with just the GPIO controller for LEDs and push-buttons and an extra UART. 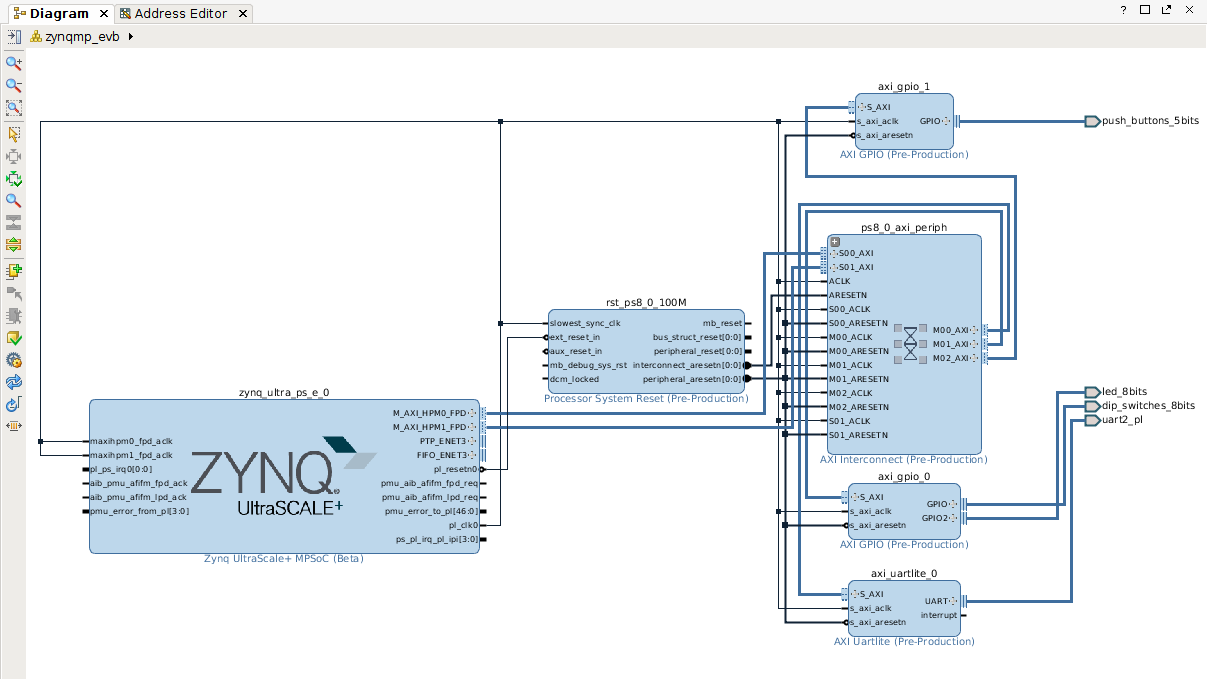
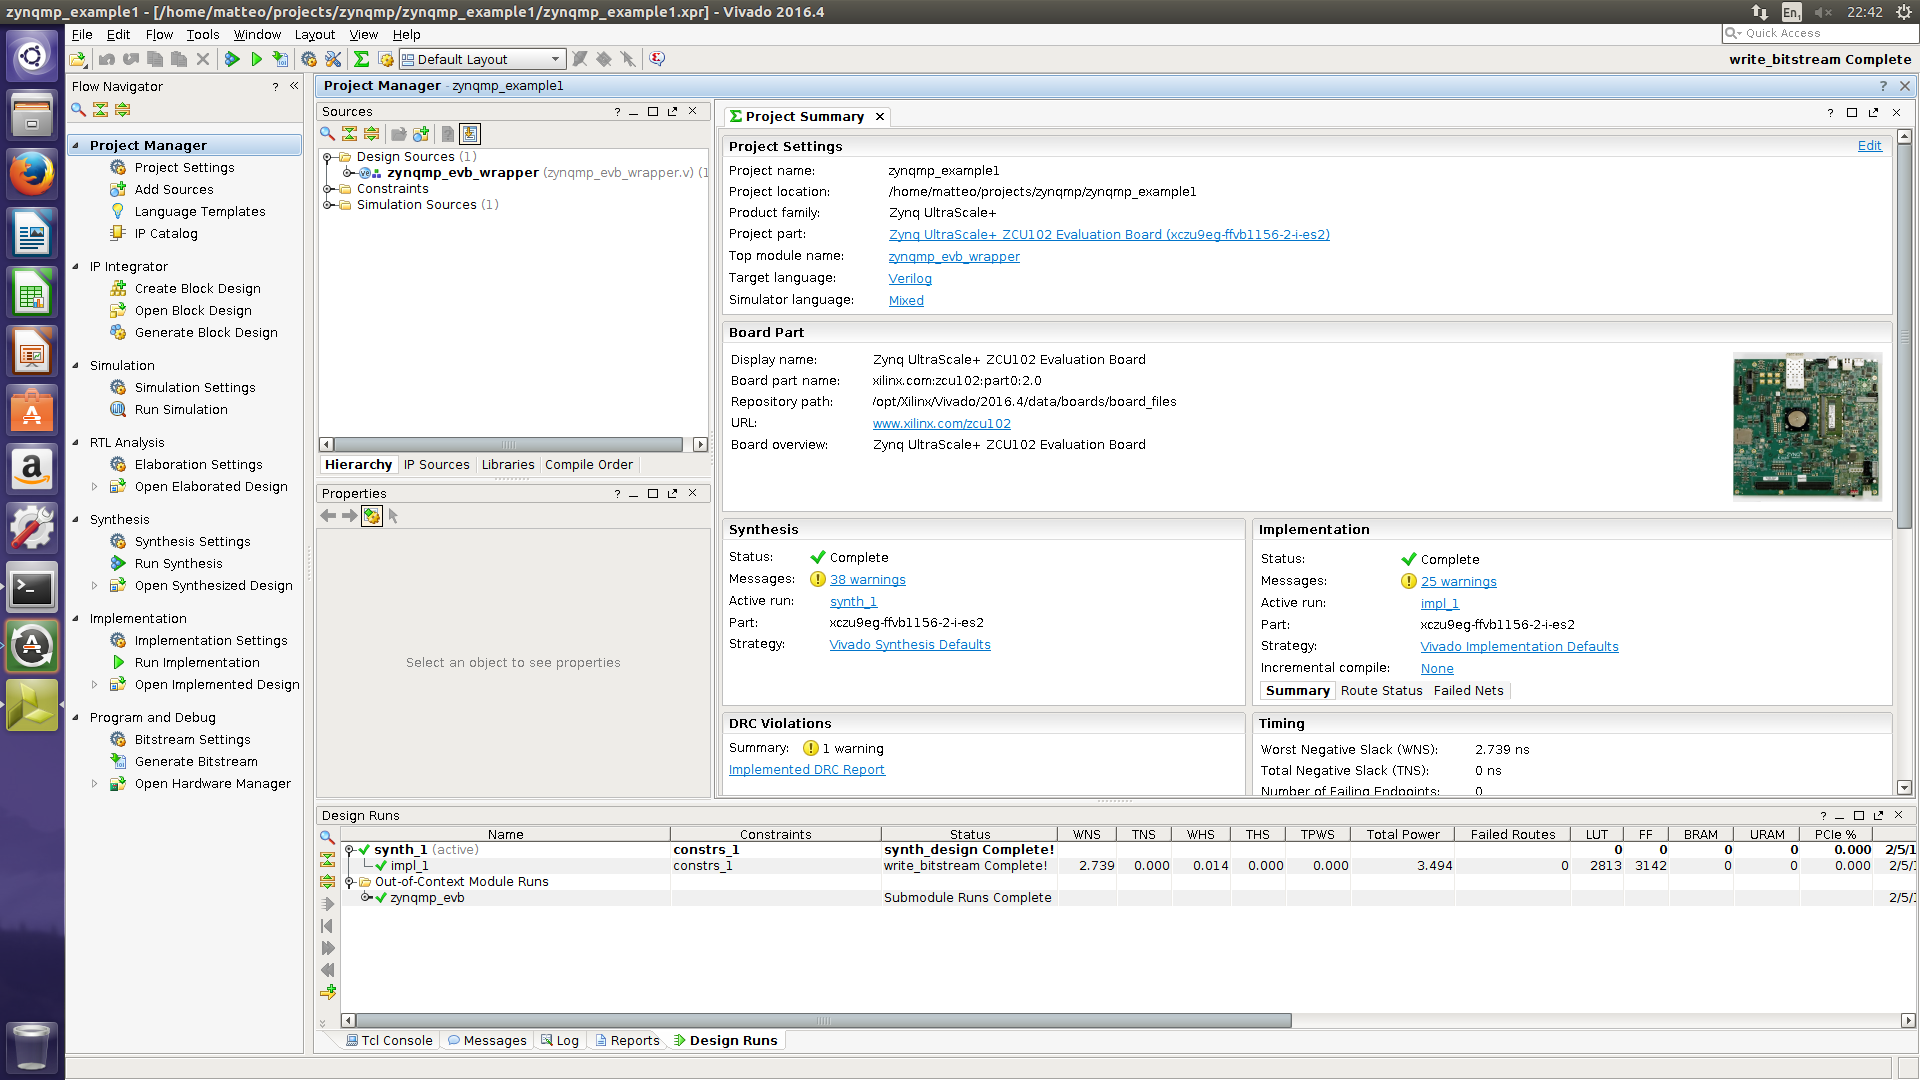
Generate the bitstream. Once the bitstream generation has completed, export the hardware design and launch the SDK.
Note: if you are using Ubuntu you need to add the following to the file .settings64-Software_Development_Kit__SDK_.sh otherwise Eclipse will crash:
export SWT_GTK3=0
BOOT.BIN creation
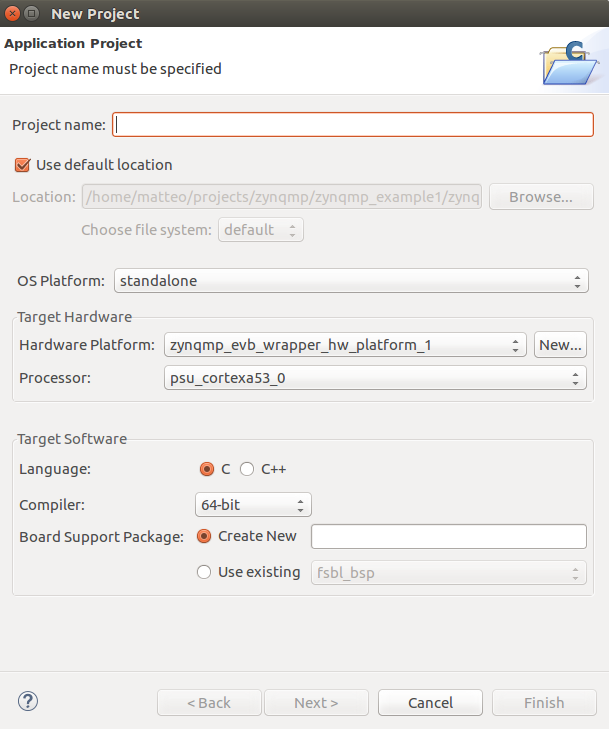
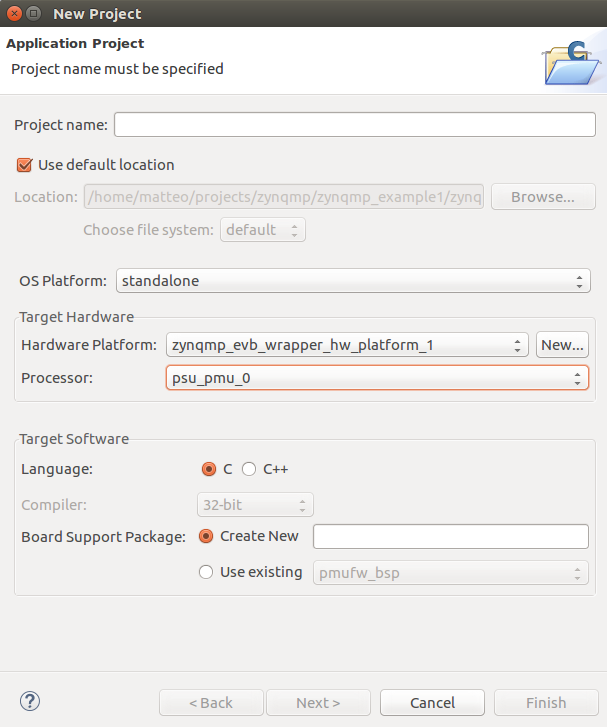
From the Vivado SDK create an application named fsbl for the processor psu_cortexa53_0 using as hardware platform the one created in Vivado.
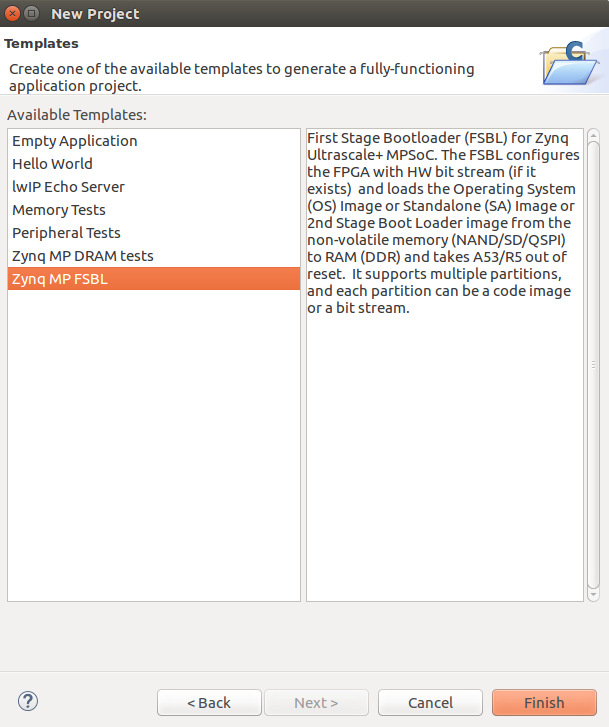
The template to be used is Zynq MP FSBL.
Similarly create an application named pmufw for the PMU selecting psu_pmu_0 as target processor. There is only one template "ZynqMP PMU firmware".
Copy fsbl.elf, pmufw.elf, bitstream (from the Vivado project directory), u-boot.elf and arm-trusted-firmware (renamed as bl31.elf) from the Yocto deploy/images directory in one directory. Then create the .bif file. i.e. standard_a53.bif:
the_ROM_image:
{
	[fsbl_config] a5x_x64
	[pmufw_image]pmufw.elf
	[bootloader]fsbl.elf
	[destination_device=pl]zynqmp_evb_wrapper.bit
	[destination_cpu=a5x-0]bl31.elf
	[destination_cpu=a5x-0,exception_level=el-2]u-boot.elf
}
From the SDK command line, run the bootgen tools inside the directory with FSBL, etc
bootgen -arch zynqmp -image standard_a53.bif -w -o BOOT.bin

SD card preparation
Create two partition in the SD card as described here:
The VFAT partition should be bigger than 32M since the .bin file is quite big. For example 128M.
Copy boot.bin, Image, system.dtb in the boot partition. Extract the root file system in the ROOT ext4 partition (as root).
Umount the BOOT and ROOT partition.
First boot
Insert the SD card in the SD connector. Set the boot signals to 'E' if you have ZCU02 rev 1 with ES2 chip (https://forums.xilinx.com/t5/Xilinx-Boards-and-Kits/ZCU102-fail-to-boot-from-SD-card/m-p/739836#M14443)
Connect a USB cable to J83 to a PC. Install USB-UART drivers if needed. Use a terminal emulation program i.e. Putty to connect to the serial port. Check with dmesg or device manager the name of the serial port. The configuration is 115200 8N1.
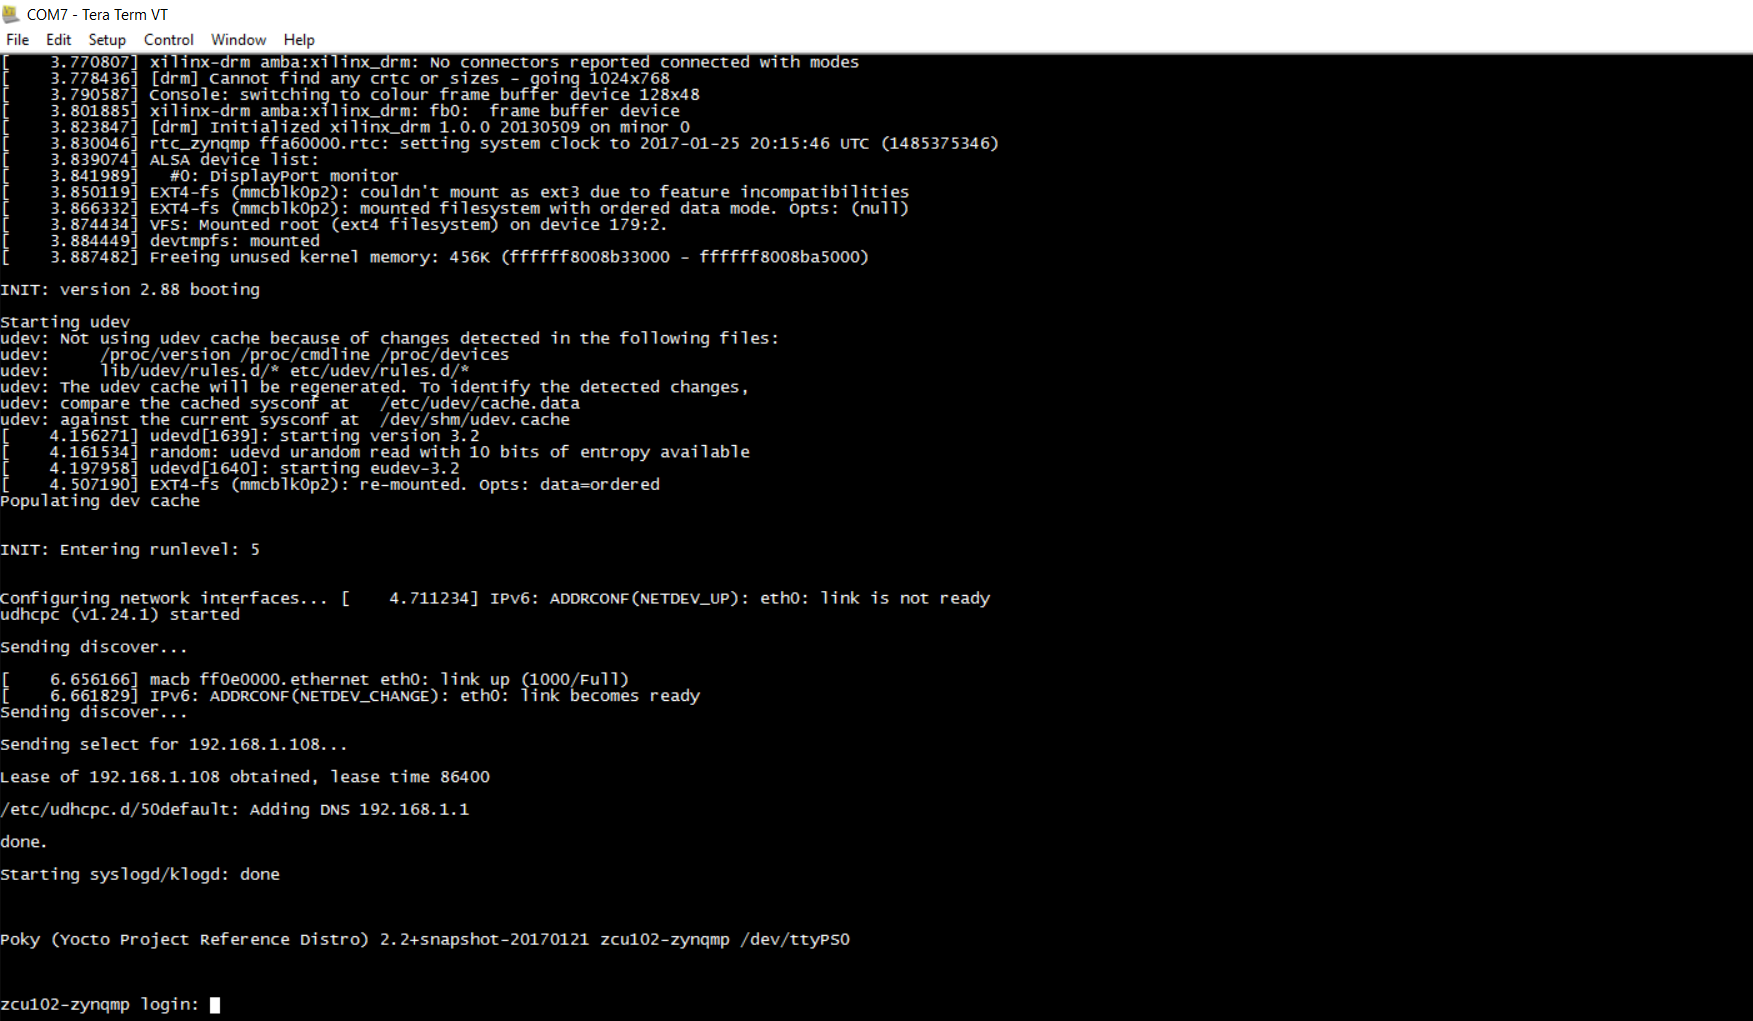
Turn on the board and you should see this log:
Conclusion
In this first article I have shown how to create and boot a Yocto Linux image on the Zynq MPSoC. In future articles we will see more advanced application like video input and output.
Starware Design will be present at Embedded World 2017, Hall 3, Stand 555/C (part of the Great Britain stand). If you are interested to know more in the design services provided by Starware Design get in touch.